Science
St Patrick's DayPreschoolers13 Comments
I mentioned in my last newsletter that I was out of contact paper (a shame, since its one of my must have craft supplies). Well, this was the rainbow suncatcher that I’ve been waiting to make!
And it was definitely worth the wait! I love seeing this in the window (scroll down to see how it turned out)!
Of course, you could make a rainbow suncatcher with all seven rainbow colors and have it turn out just as pretty. But we did it minimally, with the three primary colors to add a twist of learning about color mixing too!
And by the end, George told me all the colors we made and how we made it. Success!
Please note: this rainbow suncatcher does not accurately portray a real rainbow, it does not show all seven colors of a rainbow and it also shows red twice. Its just the way this one turns out.
Find 11 more rainbow activities from other hands on moms!
How to make our rainbow suncatcher
First of all, you need some contact paper (affiliate link).
After I sent out my email that I didn’t have any, a teacher emailed me and suggested using wax paper and glue instead. That would have definitely worked too! I love that idea and will be tucking that away for when I need it.
You also need tissue paper in the three primary colors (affiliate link) – yellow, red and blue – find scraps of it, or buy some cheap at the dollar store. You need very little (not even a sheet of each color).
Before inviting George to make the rainbow suncatcher, I first held up the contact paper to the window to decide how big I needed it to be. I then cut an arch (to resemble half a rainbow) that’s about 5-6 inches wide.

I drew two lines (using pen) on the contact paper to divide the arch into thirds. These are going to be used as guides for the colors.
I taped the contact paper, sticky side up, on the table. George then started with red tissue paper on the top edge of the arch.
We ripped tissue paper together and he stuck it on, all along the outer edge of the rainbow.
Then he moved on to yellow tissue paper.

We talked about overlapping the yellow onto the red tissue paper, and what would happen with them together.
They’d make orange!
The yellow tissue paper followed along the first line I drew and made sure to overlap some of the red too.
Tip: When overlapping the tissue paper, don’t worry about it not sticking, we’ll take care of that at the end!
And then onto the blue tissue paper. Same thing as the yellow, the blue followed the next line and overlapped some of the yellow, to make green!

And finally, the rainbow was finished off with red tissue paper again along the bottom (inside) edge.
I know, red doesn’t belong on the bottom of a rainbow. But we needed to make purple, and how do you make purple?
You mix red and blue together!

Once the rainbow was completely covered in the three primary colors, you’ll notice that some of the overlapping tissue paper doesn’t stick to each other. How could it?
To take care of this, I cut out a second arch of contact paper and laid it over top, sandwiching the tissue paper in between.

You see in the photo that having it on the table doesn’t show the color mixing. They simply look like their solid colors.
Not very pretty at all, right?
But just wait…
I trimmed it up quickly for any stray tissue paper sticking out, or overlapping contact paper (because I don’t take the time to make a template and cut it perfectly, I eyeball!).
And then, the funnest part of all, George took his rainbow suncatcher to the window to see exactly what he made!

A gorgeous rainbow!
So very pretty and I wish the photo even did it justice!
(Taking photos into a window is so hard! Any tips for me?)

WANT TO SAVE THIS ACTIVITY?
Enter your email below & we'll send it straight to your inbox so you can access this activity later! Plus, you'll get simple activities from us every week!
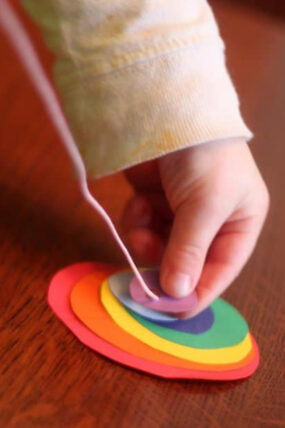 Size Sorting Circles Rainbow Necklace Toddler Craft
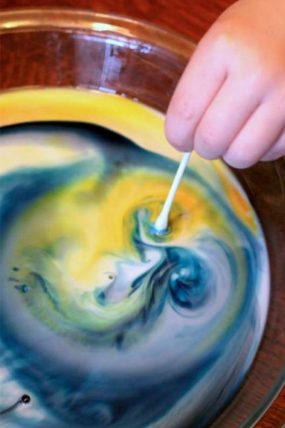 Discover an Easy Magical Color Changing Milk Experiment for Kids

Aly says
What a lovely idea to dress up windows.I can see my 6 year loving this.Thanks for taking part in the Parenting Pin-It Party.
h.x says
Georgeous! What a great idea! Thank you for all your inspiration, love how simple yet educational your activities are, we done many of them with the kids and looking forward to more.
Jamie Reimer says
Aw thank you!!