Crafts
St Patrick's DayToddlers50 Comments
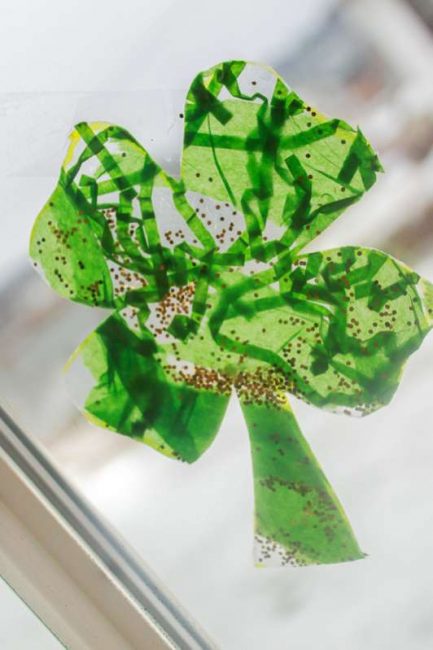
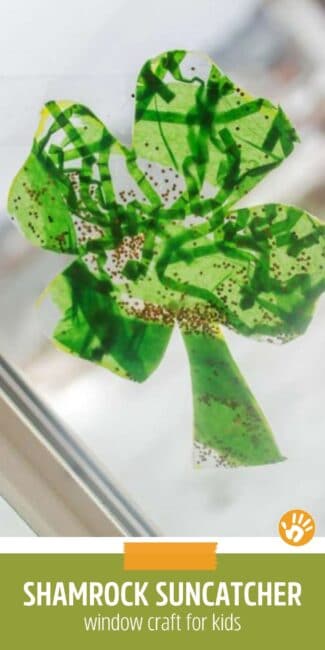
Make a pretty shamrock suncatcher window craft as an easy toddler craft for St. Patrick’s Day.
Here’s how to make the shamrock suncatcher craft for St. Patrick’s Day
I laid out a piece of contact paper, sticky side up.
Henry added gold glitter.
… And more glitter.
(We may have had a glitter mishap that went something like this: “Mom, it isn’t coming out fast enough!” Then he turned the top to the big opening and just poured. We ended up starting over…)

Then add lots of green for your shamrock.
That’s easy enough, its Henry’s favorite color!
Rip of lots of green tissue paper and arrange on the contact paper.
We also added crinkle green grass paper (affiliate link).
Oh, and add more glitter in for good measure.

Green Collage to Start Your Suncatcher!
When your green collage is finished, cover it with another piece of contact paper and smash together as flat as possible.
Hold up in the light to check how the suncatcher catches the light!
Pretty!

Cut Out Shamrocks with Adult Help
Next, I cut out the shamrocks.
An adult should handle this part.
The plan was to cut out lots of little ones and decorate our tree, but it turns out that contact paper isn’t too easy to cut.
I’m not sure if we covered the contact paper too much, or if my contact paper is just the cheap kind.
But the edges had a hard time staying stuck, so I had to scotch tape them together in spots.

So, instead of cutting lots of small shamrocks, I quickly changed it to a shamrock suncatcher craft for St. Patrick’s Day and cut out a really large one!
All the better because the light shines through it this way!
I have previously banned glitter in this house, due to clean up.
Since then, I have found a couple good solutions: play dough and lint rollers.
After our glitter mishap, I wasn’t ready to start another project with play dough and I didn’t have any lint rollers.
But, I did have something sticky: the contact paper!
I folded it sticky side out onto itself and folded down one end and made a mitten!

Henry enjoyed the cleanup after we completed the shamrock suncatcher!
It worked great for the table cleanup – the floor cleanup was another story.
If you haven’t noticed yet – from the 11 Preschool Clean Ups… I always try to involve Henry in the cleanup after a project.
To me, that just makes sense.
WANT TO SAVE THIS ACTIVITY?
Enter your email below & we'll send it straight to your inbox so you can access this activity later! Plus, you'll get simple activities from us every week!
 Preschool Craft: Shamrocks for St. Patrick’s Day
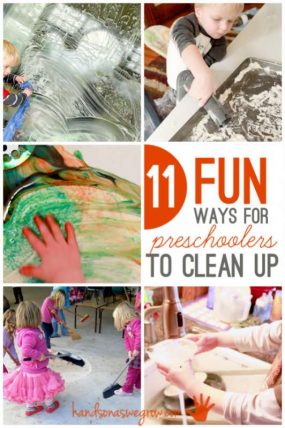 11 Fun Ways for Preschoolers to Clean Up
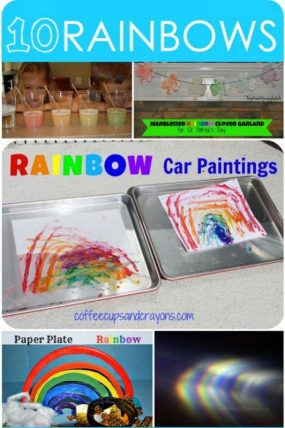 11 Colorful Rainbow Activities for Preschoolers


Trish says
I love the ideas
Thanks for sharing!
patti says
Thank you for your willingness to share. You are appreciated.
Teri Robertson says
Love your site Jamie.
You may have posted this contact paper craft elsewhere on your site. I remember this craft from when I was a kid.
Find a pretty picture in a magazine. Has to be glossy paper.
Press the picture smoothly onto clear contact paper.
Soak the contact paper in water, warmish probably best. I don’t remember how long the soak was but not too long.
Gently rub the paper off the contact paper while in the water bath. The color image transfers to the contact paper like a stained glass window.
When all the paper is off, hang the contact paper up to dry. Doesn’t take too long.
Press a sheet of clear vinyl sheeting against the contact paper. I don’t know what kind sorry. I just recall it adhered well and you had to be careful of bubbles.
Voila, a suncatcher. I think you could cut it up fairly easily.
This craft might be a bit difficult for toddlers but easy enough with just a little help from a grown up.
Many thanks for all your great ideas.
Erin McGovern says
Hi, just a question about the shamrock you made with the contact paper. What is the “green” that you added? Thanks!
Erin
Jamie Reimer says
Hey Erin – it was green tissue paper (https://amzn.to/4b2nUmq) and green crinkle paper (http://amzn.to/1TV5FUc) — (included are affiliate links to what I mean)
Sidra says
Hi, I’m new to your site and love your ideas! How did you get the shamrocks to stick to the window? Would scotch tape show through the shamrocks?
Jamie Reimer says
Yes – I just used Scotch Tape to tape them to the window and yes, it shows if you look for it – but the general appearance you don’t really notice it.
Melissa says
I love this idea! I am going to have to do this with my 4 kids! Thank you for sharing!
Elle says
This is a fabulous idea for all sorts of decorations…thank you for sharing :-)
Elle says
Hi very new…from uk. Is contact paper ….sticky back plastic?
Jamie Reimer says
Sounds like it is. I’m not sure of your terminology, but that’s what it is. Sticky on one side. You peel off a thin paper and its sticky.
Jennifer says
Lovely project! I’m a toddler teacher and clear contact paper is the best. I noticed that you had problems cutting the contact paper and having it come undone. I have learned that using one big piece and folding it over works better for cutting then placing another piece on top. I really really love this idea!
Jamie Reimer says
Ohhhh good tip about folding it over. How do you keep a toddler from placing stuff on both side though? Or do you just squish it all together?
Marlee says
The stuff is called Easter grass, I think, cuz you put it in Easter baskets.yt
Lynley says
Cute Idea! I did this with my 2 year old daughter today and she loved it! Once we were done I put the sheet on a towel, put newsprint over it and ironed it on medium. That seemed to “seal” it and it was very easy to cut and my edges stayed together.
Thanks for the fun idea!
Kalea F. says
Where do you find contact paper? I feel like I’ve scoured my town and can’t find it anywhere.
Jamie Reimer says
Kalea – you can usually find it with shelving liners. Walmart has it for sure.
Sarah Marks says
I love this idea and will definitely be having a go at shamrocks. We did similar for valentines using pink and red but I used laminate sheets which we filled and passed through the laminator. i then hole punched and added ribbon. But I am definitely going to try shamrocks!
Jodi says
We use a plastic bin for our glitter applications. Then we can pour it back out.
Shaunna @ Fantastic Fun and Learning says
I love that “crinkle green grass.” It gives a nice textured look to the craft.
Lisha says
Hi there, I stumbled upon your blog recently from another blog/Facebook page – and love your toddler ideas! We’re running a Toddler Special on our recently-started Facebook parenting page and have already recommended your ideas to our fans – I’ve personally used quite a few of them over the past 2 days already!!
Keep up the good work and we’d LOVE it f you would pass by and say hello to us at http://www.facebook.com/ConsciousParentingApproach – thank you!
Debs says
Hey luv, just thought I’d let you know that one of the links appears to be broken for one of the pics. It’s not displaying. Love you cool pin it button that appears on the pictures. Very cool. This activity looks great by the way! :)
Kristin Grieco says
This is such a great idea – I'm linking to it on my site, Preschool Universe, and looking forward to doing this with my son as well. Thanks for the inspiration!
Michelle says
Thanks so much for linking up to Made by Little Hands Mondays! I am still in awe over how great this turned out! (also love the whole first round glitter incident, sounds like a regular day in my house lol)
Rachel at Sun Scholars says
Thanks for sharing at the For the Kids Friday Link Party! I look forward to having you back this Friday!
TP Craft says
These are beautiful! I absolutely love your clean up idea. I'll have to try that sometime.
Melissa @ The Chocolate Muffin Tree says
Really Beautiful!
Candace @Naturally Educational says
These are so pretty! We've made contact paper sun catchers before but just with tissue paper…I love how you added so many materials beyond the tissue paper!
wifemomwoman says
oh the many uses of contact paper! haha. i added your project to my blog list today. http://wifemomwoman.wordpress.com/2011/03/11/st-patricks-day-crafts-for-kids/
Simone @ Doberman's by the Sea says
Very sweet.
PuppyLovePrincess says
Cutecutecute!
Rachel at Sun Scholars says
Oh my gosh, how cool is that?!! I love it! Thanks for linking up with For the Kids Fridays at SunScholars.blogspot.com. I can't wait to see what else you will be sharing!
b. lee says
what a neato project! * *
RedTedArt says
Aaaah wow! It looks truly LOVELY!!!! Keep meaning to have a go at contact paper art! Such a great idea!
Thank you so much for linking up to Kids Get Crafty! Love seeing your craft and blog!
Maggy