Crafts
SponsoredToddlersKindergartners3 Comments
We’ve been working on redoing Louis’s bedroom and a letter ‘L’ has been in the works since Christmas. Thanks to Mod Podge and Apple Barrel Paint for sponsoring this project and giving me the push I need to get it done finally!
Even better that the kids got to help make this special project for Louis. It was an easy craft for them to do too.
My husband cut the L out of boards. I have no idea what he does, I just printed off a large L onto multiple pieces of paper and cut it out and taped them together so he’d have a template. A store-bought letter would work for this project too, but I wanted it big.
Materials you’ll need to make a Textured Painted Letter for the wall:
- Mod Podge Washout (I used Mod Podge Washout for Kids since the kids were helping with this.)
- Apple Barrel paint
- Scrapbook paper in coordinating colors
- The letter of your choosing. Homemade or store-bought.
I picked my scrapbook papers to be in shades of blue to be an accent color in Louis’s bedroom. I also chose a couple paper that had the main colors of his room too, green, brown and white. The colors don’t have to be exact. They’re there just to add some interest with their design an texture.

I set the boys up to rip the scrapbook papers into pieces. Rip rip rip! Whatever size they like, as much as the wanted to.
They made a pile of torn pieces of paper for me!

I took the Mod Podge Wash Out for Kids and mixed it with some of the blue Apple Barrel paint in a dish. I suppose you could separate them and do this in two steps. But with kids, I’m all about efficiency and that’s what works for us. I also wanted the paint not to be completely solid.

The boys used foam brushes to apply the colored glue mixture to the letter.
As they applied they stuck their ripped of pieces of scrapbook paper to it. However they wanted.
I stepped in to fill in all the gaps with smaller pieces of papers. I didn’t want any holes showing through.

As they stuck the paper to the L, they applied the glue mixture over the paper too. This stuck the paper down well, but also acted as a way to unify the whole piece and not to be overwhelmed with all the patterns of paper.
Then it was time to dry.

Once the initial coat of paper and the colored glue was dry, I trimmed the papers around the edge so there weren’t any overhangs. Then I painted the sides of the letter blue too.
It took a couple coats to cover the sides fully since it was raw wood. I did notice that the paper was a little too solid with blue, so I took a wet cloth and rubbed over section of the letter to let the paper show through more. The Mod Podge Wash Out for Kids came in handy for that! It worked perfectly to wipe off just enough.

Be sure to catch up with Plaid Crafts:
- Follow Plaid Crafts on Pinterest
- Follow Plaid Crafts on Twitter
- Like Plaid Crafts on Facebook
This post was written as part of a campaign with The Blueprint Social. All opinions are my own.
WANT TO SAVE THIS ACTIVITY?
Enter your email below & we'll send it straight to your inbox so you can access this activity later! Plus, you'll get simple activities from us every week!
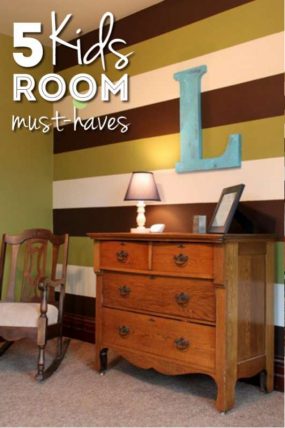 5 Things I Want For My Kids’ Rooms
 Display Kids Artwork from School in One Spot
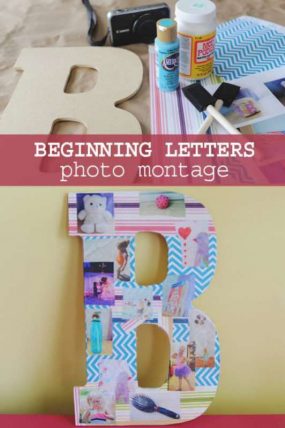 Photo Montage Craft for Kids to Learn Beginning Letters


rdukes says
Cute! I love monograms and the bigger, the better! Thanks so much for linking up at Project Inspire{d}!
carolinamoore says
My son is an “L” too! It looks like it was a blast… and so fun creating artwork for his own room!
Jamie Reimer says
Thanks Carolina. :)