Art Projects
SensoryPreschoolersBaby52 Comments
Finger painting for toddlers is a great sensory activity, along with a great beginning art activity for them. Make art time extra kid-friendly with simple DIY edible finger paint!
As George is getting older, it’s getting more interesting to keep him entertained during activities with Henry. Especially art activities. Because he’s usually stuck in his high chair with nothing to do.
To solve this, I included George in the activity this time. I made my own finger paint. It’s an edible recipe found At the Butterfly Ball. Look below for a quick list of the ingredients.
Simple Finger Painting for Toddlers with Edible Finger Paint You’ll Love
I love homemade, edible paint, just in case George eats it. I could have also used our Crayola Finger Paints (affiliate link), they’re non-toxic and I’d feel okay if George put some in his mouth.
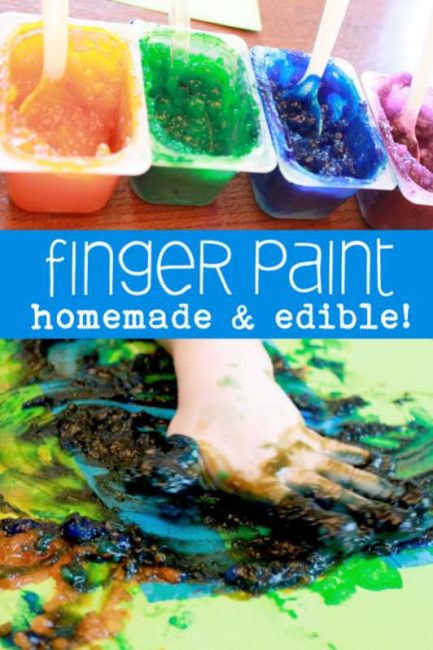
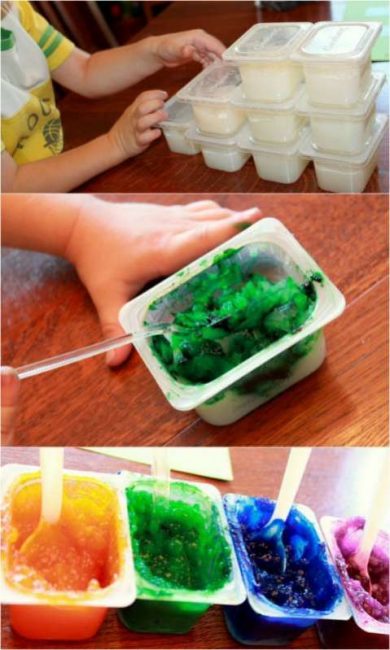
This recipe made nine baby food containers of finger paint. I made the paint myself and left them uncolored.
We’re getting a kick out of making our own craft recipes. they’re usually super easy and only include stuff you’d normally have around in your cupboards.
Check out our collection of 50 activities for your toddler.
Make Homemade Edible Finger Paint with Your Toddler
To make your own paint (just like At The Butterfly’s Ball) and do this tape resist activity, you’ll need:
- 1/2 cup cornstarch
- 2 3/4 cup cold water + 1/4 cup cold water reserved
- 1 envelope unflavored gelatin
- food coloring
- small containers
- spoons or craft sticks
- painter’s tape
- construction paper
Check out the original activity as seen on At the Butterfly’s Ball!
Mix the cornstarch and 2 3/4 cup water in a sauce pan. Bring to a boil.
Meanwhile, soak the gelatin in the additional 1/4 cup of water.
When the cornstarch mixture boils and turns clear, remove from heat and add the gelatin mixture. Stir to combine.
Cool it off and separate into your little containers. Add food coloring!
Make Tape Resist Letters with Homemade Edible Finger Paint
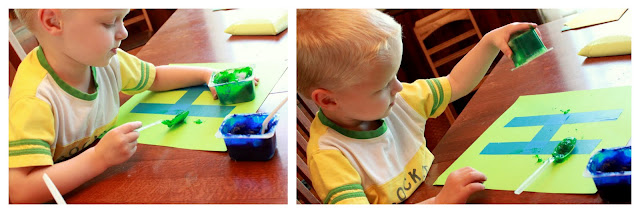
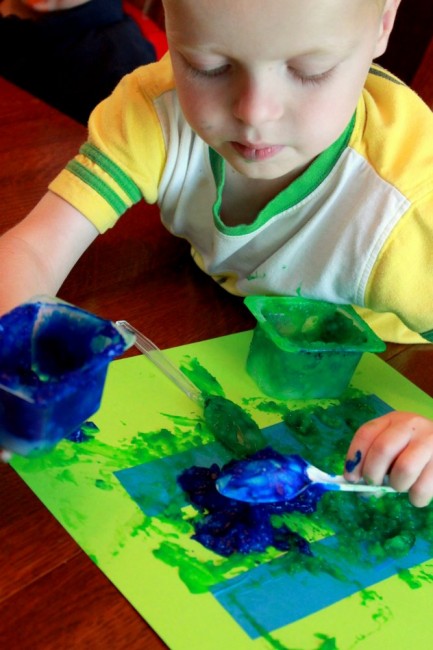
When Henry got home from preschool, I let him stir colors into the finger paint.
I taped down the letter “H” and “G” onto pieces of scrapbook paper beforehand.
Henry started into his paint right away. Spooning and dumping the paint out in globs and globs.
We used spoons and fingers to mix and paint. You could also use craft sticks or sturdy paintbrushes.
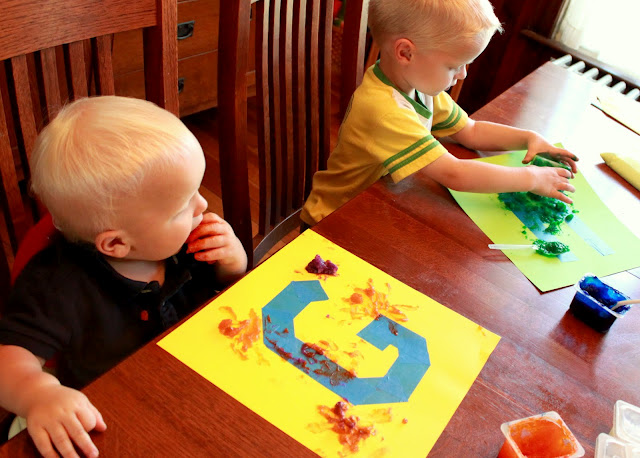
I just let him do as he pleased and tended to George.
George didn’t know what to think. He loved squishing in the homemade edible paint!
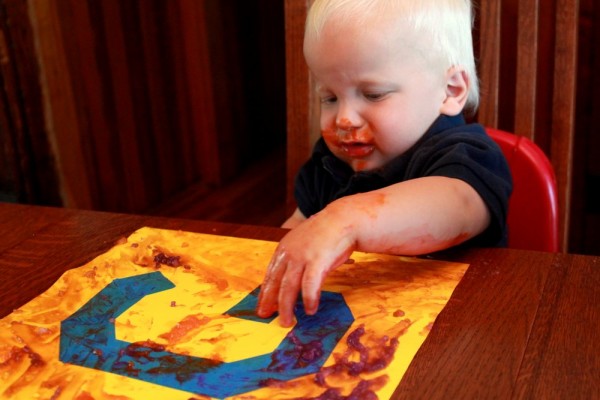
And he did manage to sneak a mouthful of paint. Only once though. It must not have tasted so good.
Meanwhile, Henry kept globbing on the paint with his spoon.
He eventually did put down the spoon and got his fingers, hands, and arms in the paint.
Looking for more cool art activities? Try these 50 creative painting ideas!
Henry thought he was being hilarious when he smacked his painting over and over, sending splatters of paint everywhere.
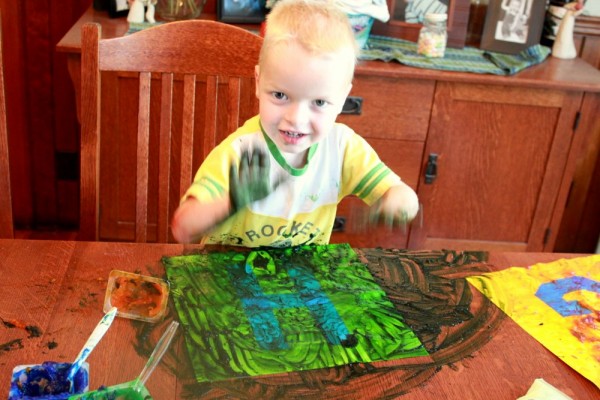
It left a pretty neat mark on his paper though. I wanted him to leave it, but kept my mouth shut. He went onto smearing it.
Everywhere.
He maybe even went onto George’s painting a little.
I really did enjoy both the boys painting side by side.
Henry really enjoyed doing it with George. George probably would’ve rather been eating though.
When Henry was finished and George had enough, I hung their paintings to dry.
The papers were soaked! They took the entire day to dry.
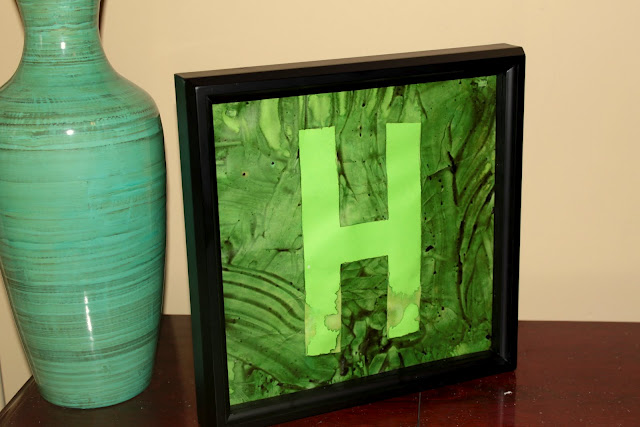
Once your tape resist letters are dry, peel off the painter’s tape. You’ll see the paint-free letter shapes that were covered by tape! So cool!
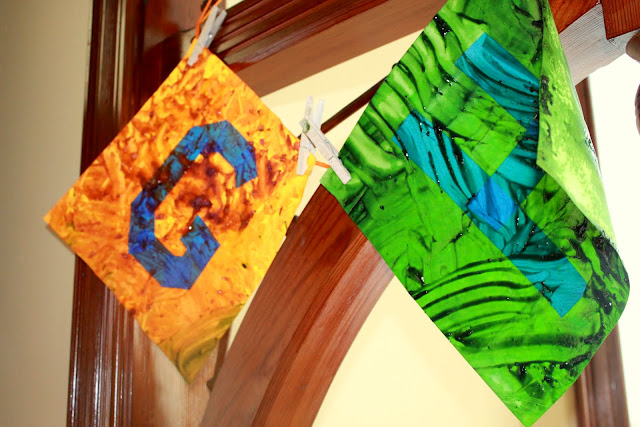
I framed Henry’s H in the 12×12 Scrapbook Frame (affiliate link) that I have. Eventually, I’ll need to grab another frame so I can hang these in Henry’s and George’s rooms.
I found the recipe for Homemade Finger Paint from At the Butterfly Ball. Head over there to see how they used their homemade edible paint!
You can also substitute the food coloring for poster paints, but it won’t be edible then.
How do you make art activities more toddler or older baby friendly? We’d love to see your creative ideas!
WANT TO SAVE THIS ACTIVITY?
Enter your email below & we'll send it straight to your inbox so you can access this activity later! Plus, you'll get simple activities from us every week!
 30 Days to Hands on Play : Paint
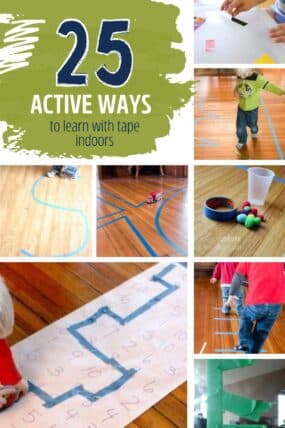


Gin kaufen says
Good post. I’m going through some off these issues as well..
kelly says
what kind of tape & paper did you use? did it pull off okay?
Aimee says
We did this but used a different edible paint recipe. We used vanilla yogurt or you could use the just regular non flavored yogurt then bought individual packets of kool aid. You get nice colors with the kool aid and totally edible and smells really good. I have a 1 yr old and an almost 3 year old. They both had a great time with this. It is a really good way to teach letters and numbers and paint!! We used painters tape and worked perfect.
Andrea says
What kind of paper did you use? I’ve tried both regular printer paper and freezer paper and both crinkled up upon drying. I was hoping to salvage the paintings but they cracked when I tried to flatten them. Any suggestions?
Jennifer L. Stewart says
I can’t wait to try this activity it sounds like the children will really enjoy it, looks like fun. Thank you hope to try more activities.
RE says
I’d like to know which tape you used! Please let us know! The tape I have sticks :(
Jamie says
I used painter’s tape (just the Blue kind) — it still stuck sometimes, I always think its because I don’t wait for it to dry completely. I haven’t figured out the secret to it yet. Let me know how it goes for you!
Aa says
try using a blow drier to heat the tape a bit before pulling it off.. they say that’s how it works with walls.. perhaps artwork too?
Jennifer Fischer says
Do you have to use the gelatin? Is there a gelatin alternative? I love the idea of edible fingerpaint, since I have a 2.5 year old and 8 month old. Thanks!! (pssst…I’m part of KBN)
Jamie says
Im sure there’s a recipe for some without the gelatin. Try just a flour/water mixture. Or check what The Imagination Tree has, I know she has a couple finger paint recipes.
Misty says
I love this! Thanks for sharing!
Jamie Reimer says
I used painter's tape – it peels off easily.
Jamie Reimer says
I know it didn't stain clothes and whatnot. I don't think it stained skin. I do know that it needs to be refrigerated if you're going to keep it. It does mold…
Anonymous says
Oh, and how did it clean up? Does it stain clothes/furniture/skin? I'd like to know a little about what to expect before we try it the first time. Clothes I don't mind and it's easy to put something down around them. Wondering mostly about how long it stays on their hands/arms/faces/etc….
Anonymous says
I'd love to know about the kind of tape also! I'd Love to do this as a group activity at out playgroup soon and have other crafting ideas where I need something that will peel up like this. If you or anyone could give me some ideas of what kind of tape to look for, I'd definitely appreciate it so I don't have to do too much trial and error on my own.
~Cheers
rachelle | tinkerlab says
mmmm, paint! don't you love how children of different ages interpret art materials? i love that you framed henry's masterpiece, he must have been proud.
The Outlaw Mom says
What a fun idea! It's so hard to do art projects with a 2.5 year old and 15 month old because the younger one doesn't get that you can't eat everything yet and it spoils the older one's fun when I am just chasing her little brother around saying "no" constantly. Our art n' craft time is usually relegated to the little ones naps or when there's more than one adult around. This is the perfect problem solver! Thanks for sharing :-)
Ms. Jessi says
I loved that you linked this on LINK YOUR MESS! I pinned this awhile ago. It's such a great recipe. :)
Jackie H. says
Great ideas. I tried painting with my boys last week. We were going to stamp with apples cut in 1/2. My one 1/2 year old wouldn't stop eating the paint covered apple… looks like I'm going to have to try your recipe… oh, and I pinned your letters onto my letter learning pinterst board!
Cathy@pre-schoolplay says
This looks such fun! Gonna have to give it a go:))
katepickle says
these look fab.. they'd make lovely presents framed up!
Art For Little Hands says
this is awesome. I like so much about it. Edible — awesome. Tape resist — always fun. Messy — the best.
stephanie a. says
what an awesome, easy idea! i love the tape resist aspect.
Rebekah says
Did u use painters tape? I tried this with painters tape but couldn't remove it without ripping the paper. And Miss E painted so much I couldn't find the tape it was covered with layers of paint. :)
thedaycarelady says
Two activities in one, and results that can be framed and kept as keepsakes. This will be a perfect activity for my multi-age group! (Would even be a good mother's day gift if the letters spelled MOM.) Thank you!!!
Liane says
Love the letter resists. We learned the hard way that homemade finger paint with ferment and explode out of the container, especially in warm summer weather. So store the extra in the fridge or freezer!
Melissa @ The Chocolate Muffin Tree says
Excellent!! Wish I would have known about this recipe when C was a baby! She has never been a big fan of finger painting.
Mom to 2 Posh Lil Divas says
so FUN – looks like you made the wise decision – LOVED seeing little George with that fistful of paint in his mouth – so funny – great pictures!!!