I’m not really sure what to call this yarn craft, because the craft got adjusted many times during the process. Remember last week when I had two failed crafts before having a success with the vehicle tracks painting? Well, this is one of the failures. It turned out to not be a failure after all.
Henry attempted to cut some yarn (again), but yarn is not a great material to learn to cut. I cut various lengths of yarn in various colors. As I cut each piece, I asked Henry,
“Should this piece be long or short?” “Longer?” “How about this short?”
Henry mixed a watered down glue mixture in a cake pan. (Do not give your kid any more water than you actually want to add. Our glue mixture ended up very watered down.) Stir it up any way you like. With a paintbrush. With your hands. Toss it. Turn it.

Bottom line: Coat the yarn with glue!
This is where the craft started to take new shape.

Attempt 1 :
To make a balloon shape with yarn like I found on No Time For FlashCards. Once Henry started placing the yarn over the balloon, I realized there was no way he’d be able to wrap it around the balloon without me doing the entire craft myself.
Then, Attempt 2 :
Just to pile up the yarn on a sheet pan and make a sort of yarn-mobile. (Like our Spaghetti Mobile flop.) With every piece of yarn, Henry reached it as high as he could, using the paintbrush to make it even higher!
I think Attempt 2 would have been a fine craft… but then I thought of the muffin tin! Henry transferred the yarn once again, from the pan to the muffin tin. Again, reaching as high as we could with each piece.

Henry carefully dangled each piece into each spot.
In a couple of places, Henry created what he called ‘bridges’ between the cups.

Then we left them sit to dry. And dry. I put them in the oven to speed up the process (being very cautious because of the Spaghetti Flop, I put it only on 150 degrees for only 20 minutes).
Still not dry. Wait some more. I squirted some straight glue over the yarn. (I was worried our mixture was too watered down.)

Two full days later… They were dry.
I asked Henry what he’d like to do with the little yarn circles. He wanted to string them together and hang them on the window.

Our new Yarn Circle Garland.

WANT TO SAVE THIS ACTIVITY?
Enter your email below & we'll send it straight to your inbox so you can access this activity later! Plus, you'll get simple activities from us every week!
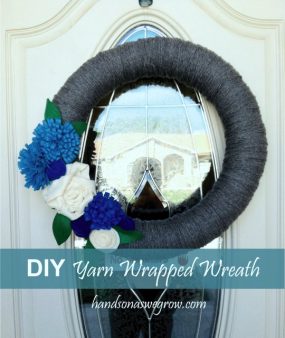 DIY Yarn Wrapped Wreath
 11 Fun Ways for Preschoolers to Clean Up
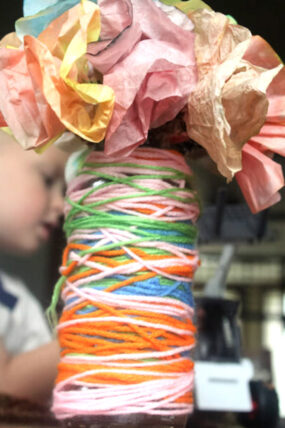 Wrapped Yarn Vase Craft for Mother’s Day


Sue says
You need to have a finished picture of what your crafts look like.
Jamie Reimer says
Hey Sue – the picture of the yarn hanging in the window is the finished picture.
Najaala says
I am toddler teacher and I tried the yarn garland the kids loved dipping the yarn into the watery glue. However it takes forever to dry so our art project has been drying for the whole weekend. looking forward to hang it up in the class.
Jamie Reimer says
I agree! It takes FOREVER to dry. Try sticking it in the oven – at a LOW temp and check it frequently – but that should help speed it up a little.
Vicky says
So pretty and festive and I love how something that looks like a failure at the time turns out to be a great success. Way to think outside the box! Vicky from http://www.messforless.net
Kristin says
Love this! Found your blog and signed up for your newsletter via “Crafty Crow.” Can’t wait to read more!
Kristin
Jamie says
Yay! Thanks for subscribing when you stopped by! Do you have kids? What ages?
CSI girl says
Really fun! I hope you will share this wreath this week over at The cSI Project and any other projects you have using yarn.
http://www.thecsiproject.com
I know it is from 2011 but still a goodie and continues to inspire.
Smiles
Dee, the CSI Girl
prince n princess mum says
Nice activity for the kids
Michelle says
So messy! And sooo fun! :)
Thanks for adding this post in last week's High paw! Hope to see you participate this week too! We're always looking forward to see what you'll come up with next! :)
creativejewishmom/sara says
a really wonderful toddler craft that the whole family could enjoy! thanks so much for sharing on Craft Schooling Sunday!
Angelyn says
Loved that you were able to accept that he couldn't do the original project, and move on to a new idea. I sometimes struggle wanting my kids crafts to have a specific and perfect end result, but then they don't get any fun or learning out of it, and you end up doing the whole project! This is a great reminder that if you just let go and let kids do their thing, you'll still get great results. PLus I loved his bridges, too adorable/smart!
Visiting from Made by Little Hands Monday's.
Angelyn
Raising a Happy Child says
Your mess tolerance is very high! I was shaking my head just looking at the pictures :) The results are quite nice though.
Penny says
Great post on a great craft! Thanks for making me smile.
Elle Belles Bows says
Love how you turned it around into something fun and that you can laugh about!
Kerri
RedTedArt says
Isn't it wonderful when you can turn a "failure" into something fabulous? Clever you! Love this!
Thank you linking to Kids Get Crafty – fab to have you there every week!
Maggy
Deborah says
How fun! I love all the bright colors of yarn!
Anna @ The Imagination Tree says
Lovely reflections on how process art/creativity often really is with young children! And this is the way it should be isn't it? When it's just SO perfect and elaborate there's no way the child really did it and what's the point in that?! Lovely end product and even better fun and mess in the making :-)
MyKidsMake says
they look great! Glad that you got it to work out!!!!
Melissa @ The Chocolate Muffin Tree says
Love the pics! Love our sense of humor in it all! Looks like you had fun!