Science
SensoryAll Ages27 Comments
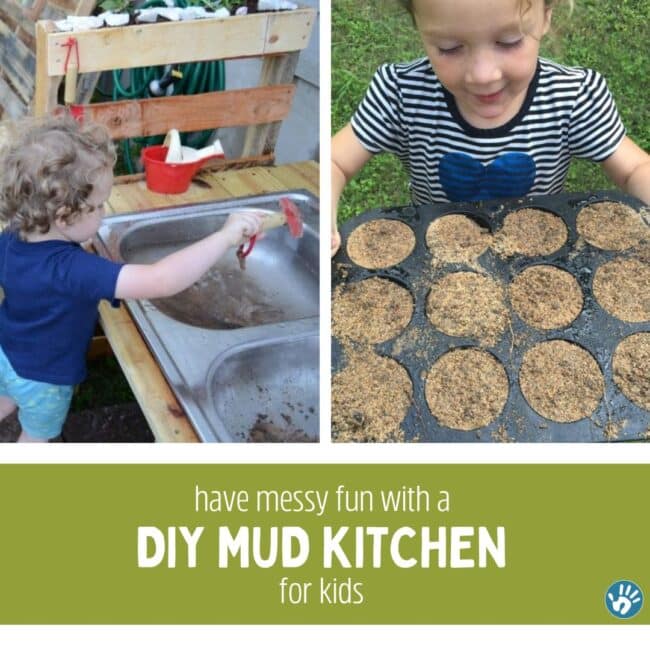
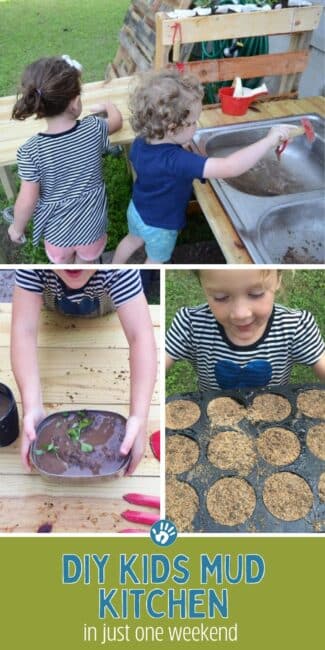
Learn how to build a DIY kids mud kitchen in just one weekend with an easy tutorial from guest writer, Bryn. Your toddlers and preschools will love making mud pies in their new play space!
If you have a toddler or preschooler, you are probably familiar with the fact that they love to get dirty.
My 2-year-old and 4-year-old are always asking to do projects that involved making a mess. So when my husband proposed the idea of a mud kitchen for them outdoors I was definitely on board.
Why is a mud kitchen good for children?
A mud kitchen provides an environment for kids to explore nature with their senses and connect to it through play.
A mud kitchen can offer a space for imaginative play, sensory play, nature science experiments and mixing, interactive play with friends and siblings a long with improving fine motor skills as they scoop and pour.
The benefits of a kids mud kitchen can easily be seen by trying this DIY in One Day and watching to see what your kids come up with.

What is a mud kitchen?
A mud kitchen is basically a place for young kids to take all of those messy activities and move them outdoors. If you’re like me and you want your kids to spend as much time outdoors as possible. So, then it’s a no-brainer.
The mud kitchen we ended up with looks amazing and was actually really simple to build.
And it only took a matter of hours instead of days.
Here’s what you’ll need to make a kids mud kitchen:
- Wood (we used two 2×4’s and four 1×6’s) – $9
- Pallets – two half pallets or one full pallet that you can cut in half (can often find for free)
- Wood Screws
- 10 Pavers (you may have a few extra around your yard or purchase for around $3 each)
- Sink (price varies greatly — you can use bins or try a Habitat ReStore for a cheap option)
- Drain strainer – $4
- Flowers (a fun finishing touch — you could also have your kids plant seeds on their mud kitchen)
Step By Step How To Create a Mud Kitchen
First, we built the side table.
This just involved creating a tabletop by cutting two of the 1x6x8 boards in half leaving four equal length boards.
We used scrap wood from a fence repair for the cross sections and then used the 2×4’s as legs.

Next, we made the longer table which was a little more complicated because you have to account for the sink.
Again, we used the 1×6 boards to make the table top.
And measured around the sink to leave a drop-in hole for it.
You may want two separate holes if you’re using bins.
If you’re using an actual sink it should come with brackets and screws to attach it to the wood.

Next, we attached the half pallets to each side of the main sink table with wood screws. And then added a bottom to the top section of the pallet so that we could plant some flowers in them.
This idea of adding a little natural beauty to our DIY mud kitchen made it that much more inviting for our kids.

We decided that if we ever need to re-plant something, we’d have the kids plant seeds so they can watch the different stages of seeds to seedlings to plants.

We chose to leave the side table detached from the main sink table. So that we could move it around to different areas of the yard.
This idea also gives us the option to even move it to use as a kitchen island to keep the kids mud kitchen layout evolving.
Sometimes the results of a small change like that can give a whole new life to an activity for kids.

The final touches included using some wood screws (hooks would probably be prettier) on the sides of the pallets for hanging the kids’ tools and kitchen utensils on.

We then laid out the pavers to make a floor and added a water-loving plant under the sink to absorb a lot of the drippings.

Finally, the fun part!
A wagon full of sand and dirt that made for some amazing mud pies — and mud muffins and mud salads and mud coffee — the play was hours of endless creation.
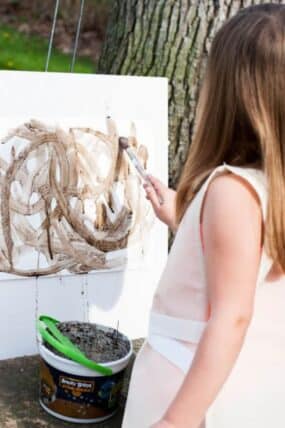
Looking for more muddy fun? Try making mud prints!
Mission accomplished! I was pleasantly surprised by how easy this kids mud kitchen was to put together and for a very low cost as well.
We are very happy with the results and that it only took a matter of hours to complete.

We just spent one Saturday working on it and it has been such a crowd pleaser with our kids.

I’m thrilled to have another activity outside to keep them playing and using their imaginations this summer!

 About the Writer
 About the Writer
Bryn Huntpalmer is a mother of two young children living in Austin, Texas where she currently works as an editor and writer for Modernize.com with the goal of empowering homeowners with the expert guidance and educational tools they need to take on big home projects with confidence.
WANT TO SAVE THIS ACTIVITY?
Enter your email below & we'll send it straight to your inbox so you can access this activity later! Plus, you'll get simple activities from us every week!


John says
This is amazing! Repurposing old stuff is such a great idea. Keep on posting tips and ideas.
Jenny Jenkins says
Wow! I found your content here very creative and helpful. Thank you so much. I also found some great information here https://conservationconstructionofdallas.com/tipsandnews/ I will keep checking back for more great content. Very happy to read this.
Carly says
My new neighbours were throwing out a kitchen sink, and so I nabbed it for building a play kitchen for/with my littles. Your example is exactly what I was looking for: practical, versatile, easy to build, and practically free! We just entered into the snow and cold up here in Canada, but maybe I can throw this together in the garage or on a warmer day – we make “chocolate and vanilla” (dirt and snow) stuff up here, haha.
K says
love this post! how do you handle the drainage from the “sink”?
Tabitha Lightfoot says
Hi K! You could use the sink strainer in the sink when they are playing with it but when they are done, you can always put a bucket or something under the sink if you don’t want it to drain on to the ground!
Roxanne says
I’ve seen play sand before but I’m not sure what kind of dirt to buy that would be safe and free of chemicals. Any ideas?
Rachel says
I would just get bags of dirt from a home improvement store, probably avoiding the ones that have plant food and stuff already mixed in. Look for just plain old dirt. Have fun!
Faye says
Before I started seeing photos of mud kitchens, about 4 years ago, I was cleaning out our basement and gave away a perfect stainless steel double sink that I could have used AAAAARRRGGGG! I like the mud kitchen you built with the added plants to make it come alive with nature.
kitchen says
Your style is so unique in comparison to other folks I have read stuff from.
I appreciate you for posting when you have the opportunity, Guess
I will just bookmark this web site.
Cheryk says
Love it keep it come please I just made a mud pie kitchen for the kids but I put sand box in to play